
There are three methods of entering project time: the Time Entry form, project Timers, and the Week View form. See this section for detailed instructions for entering time using each of these three methods.
The Time Entry Form
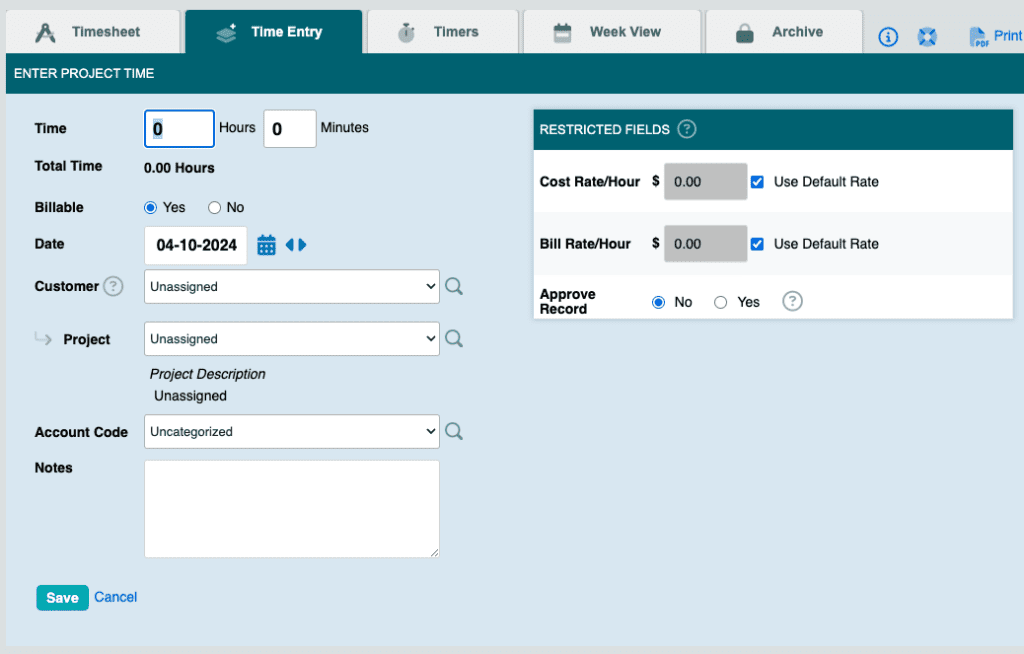
Time can be manually entered onto a user’s timesheet using the Time Entry form. The form is located on the Time Entry tab of each user’s Project Time page. Administrators always have access to this form, and supervisors with proper permissions can use this form, but its use can be restricted for specific employees via access controls.
Additionally, administrators (and supervisors with proper permissions) have the ability to select whether to Approve Record when entering or editing project time via the time entry form. This is useful for larger companies where one manager approves records before a different manager pays for (or bills for) employee time. If you’re the only manager or don’t need a formal approval process, you may ignore this setting.
Access Controls
Refer to our “Project Tab (Settings for Billing or Job Costing)” article to find instructions for setting up company-wide restrictions for accessing the Time Entry form. To restrict access to the Time Entry form on an individual basis, please refer to the instructions in this article.
Timers
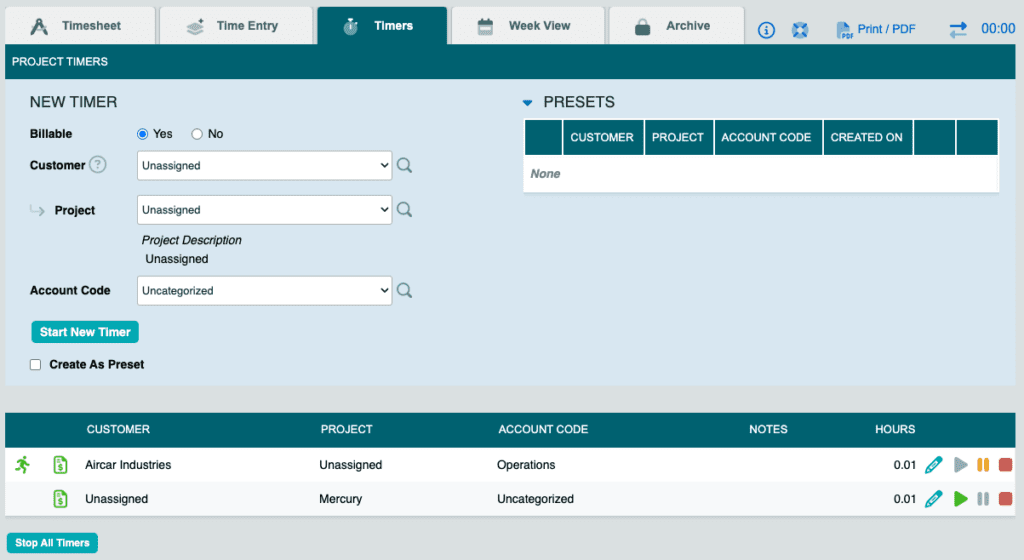
Project time can also be tracked in real time using project timers. Timers can be accessed from either the desktop or mobile site. By default, starting a new timer will pause any currently running timers, but access to simultaneous timers can be enabled on the Project tab of the Company Settings page.
If you find yourself creating the same timers multiple times, it may be beneficial to set up timer presets. Timer presets can be created by ticking the box next to Create As Preset. This will, in addition to starting a new timer with the current settings, save the currently selected list items together as a timer preset, which can be seen under the Presets column to the right.
Note: Only inactive timers (neither started nor paused) can be started from the timer presets column.
Week View
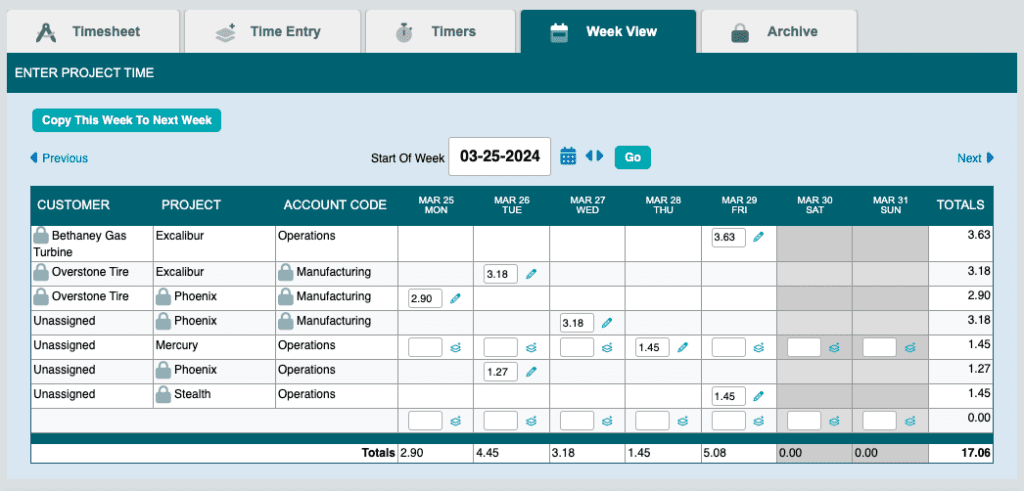
The Week View tab of a user’s Project Time page offers an alternative time entry method that displays an entire week with cells for entering time for each day. Clicking on an empty cell opens the time entry form for creating a new record, and each new combination of customer, project, and account code will create a new row in the table. Records created using this view appear on the Timesheet tab just as any other record would. Users can move between weeks using the navigation buttons at the top of the table, and the records for an entire week can be copied to the next using the Copy This Week to Next Week button.
Using Lists with Project Time
There are three lists available for tracking time on the project timesheet:
- Customers
- Projects
- Account Codes
Customers and projects may be associated with one another during setup. (For example, when entering time onto the timesheet, if the customer “Eastman” is selected from the customer list, then the project list would show only those projects associated with that customer.)
Note: Keep in mind that if a project is selected before a customer, choosing a customer that’s not affiliated with the selected project will reset the project selection.
Access to list items can be restricted on a per user basis, allowing employees to see only those list items that are relevant to them. Account codes are independent of the other lists, and are often used to represent a task, location, or job type. For job costing only, the customer list can be disabled in Company Settings.
Please refer to the articles under this section of the Help Pages for detailed instructions regarding the setup and use of these lists.