
Mileage and expenses can be entered using a form located on the Expense Entry tab on a user’s Expenses page. This form is available on both the desktop and mobile version of the website. Please refer to this article to find detailed instructions for using the expense entry form.
Tracking Receipts
Receipts can be uploaded as either a photo (JPG only) or a scanned document (PDF files of up to four pages in length). The upload can be performed from either the desktop or mobile version of the website. After receipts have been uploaded, they can be viewed either individually or compiled in downloadable PDF expense reports.
To view individual receipts:
- Navigate to a user’s expense sheet by clicking their total under the Mileage & Expenses dashboard column.
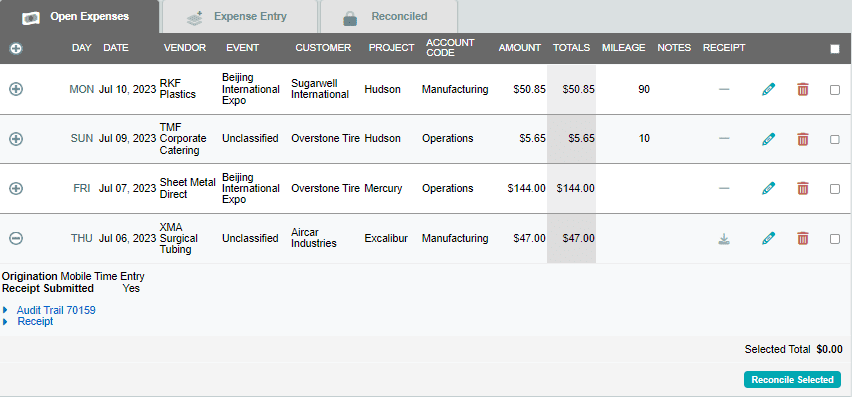
- Click on the Open Expenses or Reconciled Expenses tab where the expense is located.
- Click the expand
 button to the left of the expense entry.
 - Click the Show Receipt link.
- Alternatively, you can download the receipt by clicking the blue Download link under the Receipt column. Select your preferred orientation, and click OK.
To view a group of receipts:
- Click Reports in the left menu.
- Click to report number 11 under Mileage and Expense Tracking.
- Set the date range for the report, as well as any other parameters.
- Click the Detailed PDF button, and select your preferred orientation.
- The receipts will be compiled at the end of the downloaded PDF document.